Log In
.jpg)
Free gifts available with your purchase
Upgrade Notice: There is also an upgrade version available for owners of BLUE and BLUE-II.

When it was first released in 2005 ‘BLUE’ already reflected Rob Papen’s cutting-edge, creative, and — most importantly — musical approach toward developing virtual synthesizers. Rob Papen himself called it ‘Cross-fusion synthesis’ because it covered both Subtractive and FM synthesis in one creative concept.
With its successor BLUE-II, the ‘Cross-fusion synthesis’ was also expanded with a creative range of samples and the highly versatile XY pad.
The concept for BLUE-III still remains true to that ethos with even more added sound dimensions and features to its extended name. Firstly adding their own take on ‘Karplus Strong String Model Synthesis’, new ‘Waveforms’, new ‘Filter types’, a new range of creative ‘built-in Samples’, and lastly the option for you as a user to load up to 6 samples inside each Preset.
BLUE-III’s GUI has received an overhaul including many different sizes, the XY pad is now always on the front panel. The audio engine has received DNA from their virtual analog synthesizer B.I.T. resulting in unsurpassed audio quality.
Lastly, of course, this amazing instrument is shipped with 5000+ Presets by Rob himself and well-known industry sound designers.
BLUE-III is a phenomenally powerful virtual instrument to behold and represents an amazing journey into ‘Cross-fusion synthesis’!
Features
- 16voice Cross-Fusion Synthesis Synthesizer
- FM synthesis, Wave & Phase distortion, Virtual Analog, Spectrum Waveforms, Karplus String Model, and Samples.
- Over 5000 Presets in various music styles.
- Bank Manager
- GUI is available in sizes 100%, 125%, 150%, and 200%.
- Animated dials and faders
Oscillators
- 6 Oscillators with Algorithm control for FM synthesis or other routing combinations
- Analog-modeled waveforms, Spectrum Waveforms, Karplus String Models, and Samples
- Granular on a select range of samples.
- 6 User samples per Preset can be loaded.
- User samples with layer options included velocity split and keyboard range split
Filters
- 2 Filters with different routing options, and serial or parallel mode
- 6dB Hi-Pass and Low-Pass Filter
- 12dB Hi-Pass, Low-Pass, BandPass, and Notch Filters in 3 different characters Type 1, Type 2, and Zero Latency.
- 18dB Hi-Pass and Low-Pass Filter
- 12dB Hi-Pass, Low-Pass, BandPass, and Notch Filters in 3 different characters Type 1, Type 2, and Zero Latency.
- 36dB Hi-Pass and Low-Pass Filter
- Comb Filter Positive, and Comb Filter Negative.
- Vocal Filter, Formant 2 Band Filter, and Format 4 Band Filter
- Ring Modulation, Frequency Shift Positive, and Frequency Shift Negative.
- Amount control for Filter Envelope, Velocity, Keyboard Tracking, and Modulation Wheel
- Panning and Volume control
Amp
- Always visual except for the Sample Page, and Bank Manager Page.
- Main Volume Envelope with Attack, Decay, Sustain, Release.
- Detailed Envelope features are available in the lower midsection.
- Velocity control and Main Volume control.
Modulations
- XY pad with record option and tempo-based option. Vector mode for controlling the Oscillator 1-4.
- 4 MultiEnvelopes with up to 15 sections and tempo-based and loop features
- 14 LFOs with default destinations, and 4 free LFOs
- Modulation Sequencer
- Keyboard range and Velocity range modulation source.
- Modulation Matrix with Advanced mode
Play Modes
- 16voice Polyphonic
- MPE Poly mode
- Mono, Mono Low, Mono Hi
- Legato, Legato Low, Legato Hi
- Portamento modes with time or rate control
- Sequencer
- Arpeggiator
- Chord memory with up to 8 notes, velocity, panning, strumming, and tempo-based option
- Unison modes available are 2 up to 6 Voices, 2 and 3 Octaves, 2 and 3 Special
Arp
- 32 Steps
- 4 Free Rows can be used as a source in the Modulation Matrix or FX section.
- Ratcheting modes
Sequencer
- Monophonic Sequencer with 32 Steps
- Per step waveform selectable
- Ratching modes
FX
- 4 FX with various routing options
- 34 top-notch FX types
- 2 modulation slots per FX
Sample
- 6 user samples per preset
- Granular for the single samples
- Layer options for the 6 user samples, included split points and velocity split points.
Bank Manager
- Preset section with Bank selector section.
- Order by Date Preset listing option.
- Find option.
- Search Category option.
Back Panel
- Various Global settings, also appearing the main GUI Control Menu
- Global tuning option
- Tuning Scale options
System Requirements
PC
- Windows 7 / Windows 8 / Windows 10 / Windows 11 (32 & 64 bit)
Formats:
- VST
- AAX (Note: PC AAX for PT 12 or higher)
- Compatible with NI NKS system
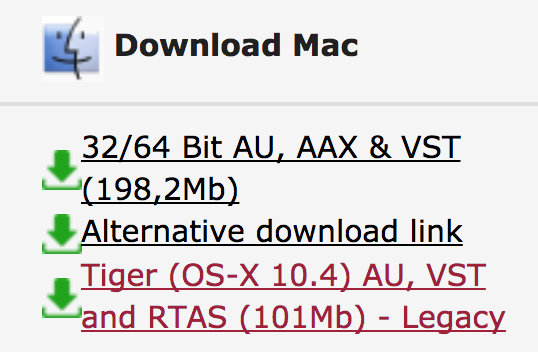
Mac
- OS-X 10.13 or higher (Apple Silicon Compatible)
Formats:
- AU
- VST
- AAX
- Compatible with NI NKS system
Notes:
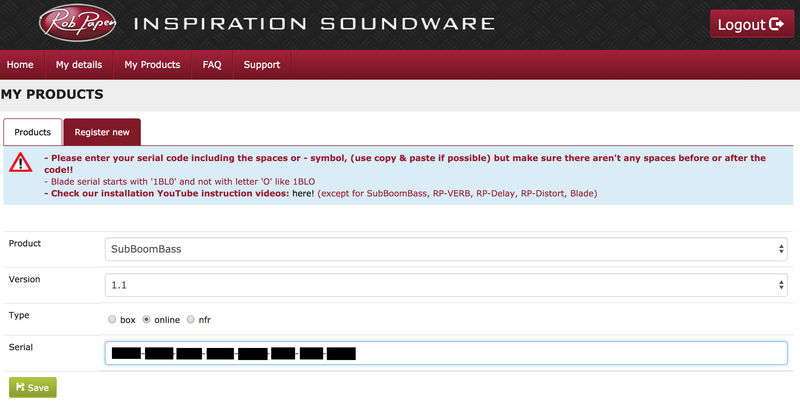
- Serial/license system with activation whilst registering the product
- 2nd serial for a secondary computer/laptop is available after you have registered the product’s original serial/license.