


 Log In

Free gifts available with your purchase
Capture "First Take" Magic With Easy-To-Use Preamp, EQ, And Compression
Now compatible with any soundcard on Mac and PC
With a vintage-inspired tube mic preamp, transparent dynamics control, and intuitively voiced EQ, the Century Tube Preamp plug‑in lets you stay in the creative zone while you record and mix, helping you capture inspiration with stunning results.
The Perfect Tube Mic Pre for your Vocals
The Century Tube Channel Strip's mic preamp will give your vocals the warmth and detail that only a tube mic pre can provide. The stunning range of tones, from subtle to saturated, will coax inspiring performances no matter the genre. Use the Low/High gain switch to match the Century's Tube Preamp to your microphone, with the Low setting complementing more modern condensers, while the High position excels with dynamic and ribbon microphones.
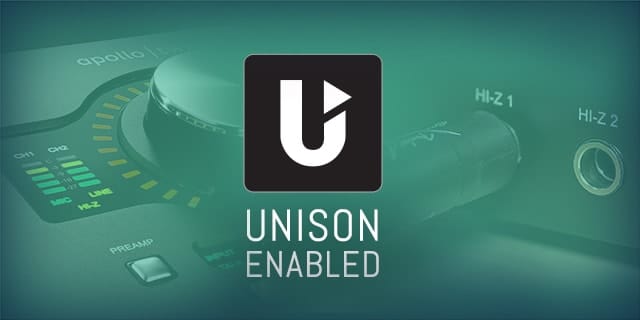
Unison Technology for Apollo
Century Tube Channel Strip blurs the lines between analog and digital, giving you all of the important impedance, gain staging “sweet spots,” and circuit behaviors of a vintage tube preamp, thanks to UA's groundbreaking Unison technology. The secret is Unison’s bi‑directional control and communication from the Century Tube Channel Strip plug‑in to the digitally controlled mic preamps in Apollo.
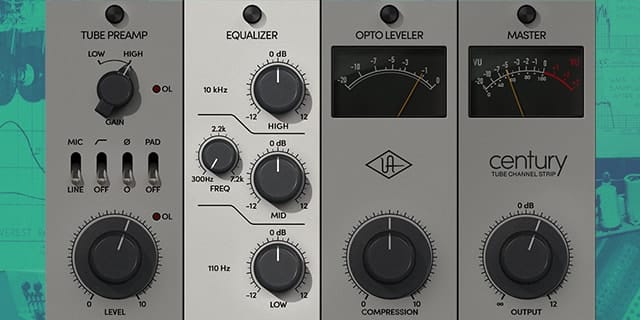
Easy EQ Seasoning for Vocals, Guitar, and More
With its intuitive, musically voiced, three-band EQ, the Century Tube Channel Strip is perfect for quickly bringing out the details in a breathy vocal, adding some punch to an overdriven electric guitar, or giving an acoustic rhythm guitar propulsive sizzle and shine.
Get Optimal Compression Quickly
Featuring a classic optical leveler, the Century Tube Channel Strip’s dynamics section takes the guesswork out of compression settings with a single knob. Quickly tame a dynamic vocal or bass performance, and add energy and harmonics to acoustic guitars or piano — all with a twist of a knob. The Century’s leveler can also compress as effect, adding grit and texture to keys and soft synths with character and vibe to spare.

Add Character and Color to your Mixes
Of course, the Century Tube Channel Strip plug‑in isn’t just for realtime recording with Apollo. You can also run it natively in your DAW and give your vocals, guitars, and synths, vintage‑inspired tone and character, without ever leaving the box.
Features
- Use any audio interface, with both UAD Native and Apollo Realtime/UAD-2 versions included
- Enhance and simplify your recording workflow with a first-pass tool designed for tracking vocals, guitars, synths and more
- Stay in the creative zone and confidently record performances with a broad stroke, "do‑no‑harm," tube channel strip
- Easily flatter your tracks with a vintage-style tube mic preamp, simple three-band EQ, and optical compressor
- Control Apollo interface mic preamp gain staging and impedance directly from the Century Tube Channel Strip plug-in via Unison™ technology
Versions Included with your Purchase
- UAD Native: Runs on your Mac or PC without any UA hardware
- Apollo Realtime & UAD-2: Runs accelerated on Apollo interfaces and UAD-2 hardware
- macOS Big Sur 11, Monterey 12, Ventura 13, Sonoma 14, Sequoia 15 and Tahoe 26
- Windows 10 or Windows 11 (64-bit editions)
- Intel, AMD, or Apple silicon processor
- Internet connection to download software and authorize UAD Native plug-ins (UADx)
- Free iLok account
- Compatible with iLok USB (2nd generation or higher) but not required
- Free UA Connect application for managing UAD Native plug-ins (UADx)
- A supported DAW compatible with VST3, AU, or AAX plug-in file formats.
