HZ Delay is a character effect which means that it doesn’t do all things equally. Matter of fact it deliberately does some things oddly or not at all to allow it to have the sort of character so sought after in older analog gear.
The sorts of effects or outcomes HZ Delay will help you to achieve are:
- Saturation
- Chorus – simple and BBD
- Echo – simple and multi-tap
- Reverb – simple early reflections
The idea is that commonly you will be balancing some or all of the above as you use HZ Delay to add depth & sparkle to any (or all) of the sounds in your mix. Maybe not the Masters but where there is a will, there is a way.
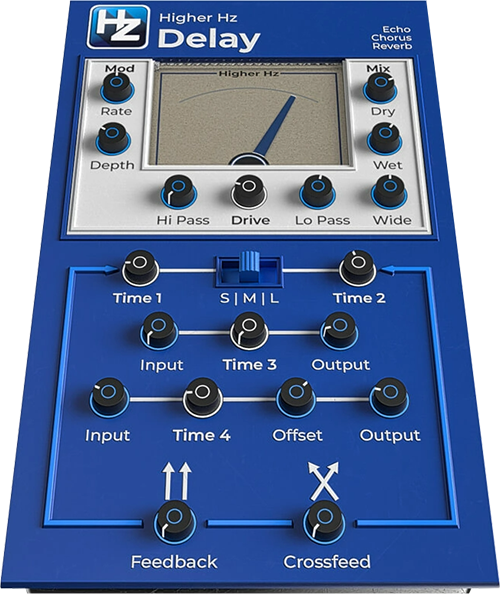
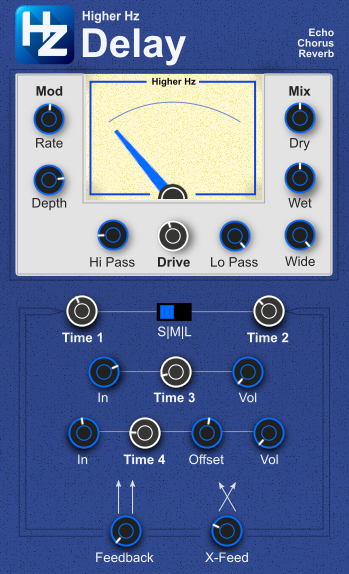
The user interface for HZ Delay is split into several parts:
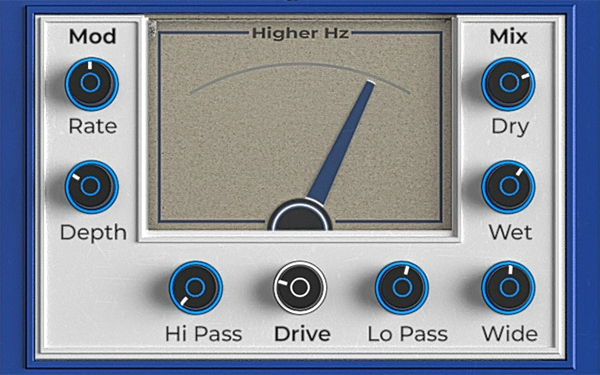
- The top with the VU meter is where general tone and levels for the whole effect are handled.
- The section below is where each of the three echo sections are set up.
Signal Flow
It is worth understanding the signal flow as not everything moves in a straight line all the time.
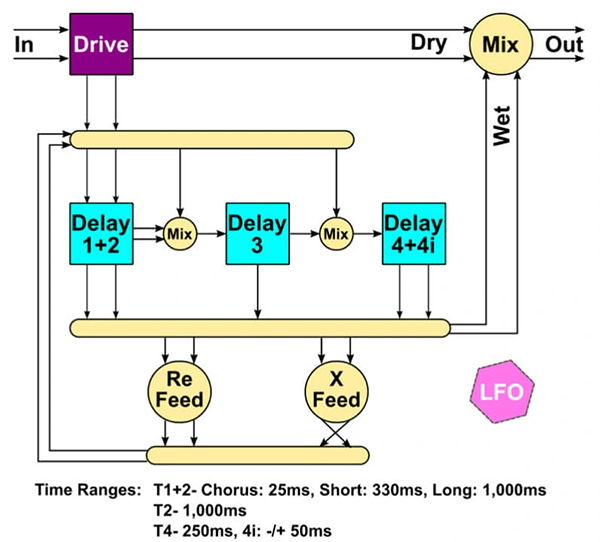
This is the signal flow diagram:
- Signal arrives in the unit via a drive that will add soft distortion to the whole signal. This includes the dry signal as well. This means that HZ Delay can actually be used as a saturation unit with no other features. The reason that it is done this way is that when the driven signal is mixed with the driven+effected signal, the results are far more interesting.
- Signal is on a Bus that initially is sent to the Delay 1+2 which is a stereo pair hard-panned left & right. These delays can be set to very short, short, and long ranges. The first setting is for chorus, the second for reverb, third for longer echoes.
- Delay 3 can be fed a mix of the initial driven signal and the Delay 1+2 signal. Delay 3 is always set to a full time range which means that it can be longer than Delay 4+4I.
- Delay 4+4i can also be fed a mix of the initial driven signal and Delay 3. The overall time is set to a short range. The 4i version is generated from the offset value which moves the right time shorter or longer than the initial value for a stereo spread.
- Each of the delay sections sends its signal to the Wet Output and can also be fed back into the first bus using standard left & right or the left & right can be reversed for a more complex signal. Take care with feedback as larger values can very easily create a feedback loop that will howl until one or both feedback knobs are lowered.
- Tone can be adjusted with a 6db high and low pass filter at the first audio bus. This means that with feedback, tone adjustments are cumulative.
- There is a modulation system that is relatively simple with Delay 1+2 but more complex for the other delay lines.
Only the second and third echo sections have unique level controls. Even then, these levels are very dependent on what comes before them. Initially, that may be a bit confusing but is part of how the unit builds its character – from being less “regular” than typical units.
Overall level can easily grow within this device and this has deliberately been left for the user to manage. Just be aware that louder always seems better so if unsure if what you are doing is improving that you may need to consider checking overall Input & Output levels using DAW meters that you trust.
Many VST synths output very high volume sounds by default. Makes them sound blammin’ but can be just too much for sensible mixing so if HZ Delay is distorting, be sure to drop your instrument output to a more conventional level (somewhere in the -12dB to -18dB arena is wise).
It is also worth noting that there is a clipper on the output as well so if you push enough level out, it will get distorted rather heavily. This is part of the character of the unit. With wise input levels, you will probably not be aware of this circuit.
Because this device can get loud and create feedback, it is always advised that a Brickwall Limiter or Clipper be applied across the masters of your DAW to prevent any LOUD events from getting to your amp/speakers/ears.
Insert or Send
Mostly it is expected that HZ Delay will be used as an insert effect – between the instrument and the mixing desk or in the insert box of the mixing desk. In these cases use the Dry signal with Wet signal to create the balance and output level that you want.
If you decide to use this device as a send effect eg Reverb, be sure that the Dry knob is set to 0, all the way to the left, so you are not returning the unaffected (yet driven) signal which will mess up your mix balances.
Controls
Top
- VU meter - this is only loosely representative of output signal activity and not designed to be remotely accurate.
- Drive - sets the amount that the input is put into saturation or overdrive. Use this with care based on the signal for the performance or it will get “crunchy” or “ragged”. This drive is not designed to make you sound like Megadeth but it can get unruly if the input is really LOUD. A little bit will probably bring a nice sparkle, sheen, or presence to your instrument, vocal or bus.
- Hi Pass - is a 6db high pass filter that will roll off lower frequencies (bass) to help reduce muddiness or enhance brightness.
- Lo Pass - is a 6db low pass filter that will roll off higher frequencies (treble) to help reduce brightness or enhance warmth.
- Dry - sets the output level for the dry (post-Drive) signal.
- Wet - sets the level for the effected signal (balance of echo lines).
- Wide - allows to progressively narrow the stereo of the wet signal. This is handy when you do not want to add excessive stereo to a sound lest it swamp the mix. If you are finding it hard to get the sound to sit nicely in the mix, this knob may be the solution as too many things being too stereo is “soup”.
- Mod Rate - sets the overall speed for the modulation LFO. This primarily controls the Delay 1+2 pair but also has an impact on the other delay lines.
- Mod Depth - sets the overall amount for the modulation. This primarily controls the Delay 1+2 pair but also has an impact on the other delay lines.
Echo 1
- Time 1 - sets the delay time for the left delay unit as set by the range setting.
- Time 2 - sets the delay time for the right delay unit as set by the range setting.
-
Range - chooses the total range for the Delay 1+2 knobs with three settings:
- 25ms for Chorus
- 330ms for short Echoes and Reverb
- 1,000ms for longer Echoes
Echo 2
- T3 In - balance the signal coming into the second echo between the initial drive and the results of Delay 1+2. That means that the delay can be “hearing” two discrete signals with different timings.
- Time 3 - is a mono delay line with a set range of 1,000ms.
- T3 Vol - sets the amount of the second echo section sent to the bus (Wet, Feedback, and T4+4i).
Echo 3
- T4 In - balance the signal coming into the third echo between the initial drive and the results of Delay 3. That means that the delay can be “hearing” two discrete signals with different timings.
- Time 4 - is a stereo delay line with a set range of 250ms.
- T4i Offset - moves the delay time for the right hand channel by -/+ 50ms so it is before/after the main timing on the left channel.
- T4 Vol - sets the amount of the second echo section sent to the bus (Wet, Feedback).
Feedback
- Feedback - sets the amount of the signal on the third bus that is sent back to the first bus (start of the delay – post-drive).
- X-Feedback - swaps the left & right channels as the signal on the third bus is sent back to the first bus (start of the delay – post-drive).
Automation and Patches
Parameter Automation is handled by your DAW so please understand how your DAW handles Automation.
Automatable Parameters have been assigned in logical order in the VST but your DAW may display them in a different order (or even not at all).
If visually impaired, some DAWs offer the option to display the parameters in a Text-list form which will help. Parameters should display in the order in the manual and broadly the signal flow.
Patches are also commonly handled at the DAW level so please consult your DAW manuals if you need to consider things like patch changes within a piece (not really recommended as the unit may output thumps).
Learn more about HigherHz.
System Requirements
- macOS 10.7 or higher - AU
- Windows 7, 10 or 11 - VST 2.4 / VST 3
- 64-bit only
Mac
1. Click the 'DOWNLOAD' button in your Plugin Boutique account.
2. Extract the .zip folder.
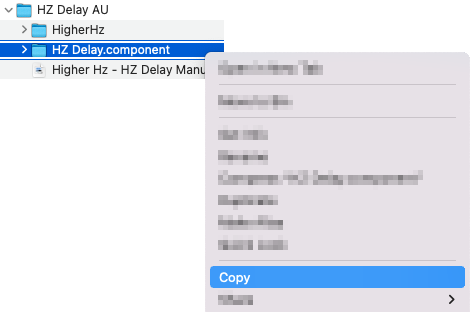
3. Right-click and copy the HZ Delay.component folder.
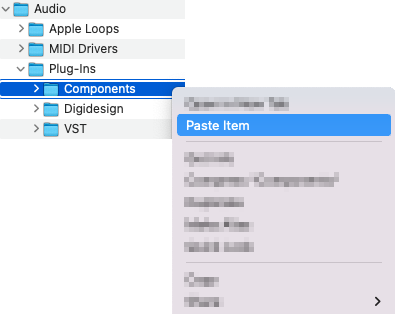
4. Navigate to ~/Library/Audio/Plug-Ins/Components > Right-click and paste the folder.
5. Launch your DAW > Insert HZ Delay as an insert on a new track.
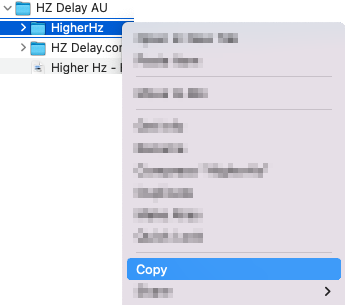
6. Right-click and copy the HigherHz folder.
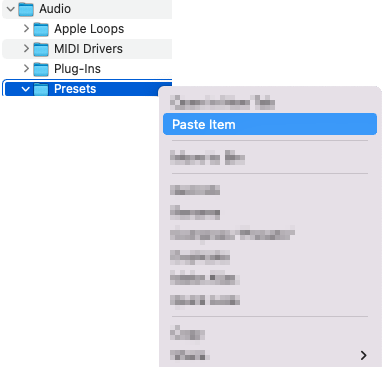
7. Navigate to ~/Library/Audio/Presets > Right-click the folder > Paste the copied folder to this location.
Your software is now installed and ready to use.
Windows
1. Click the 'DOWNLOAD' button in your Plugin Boutique account.
2. Extract the .zip folder.
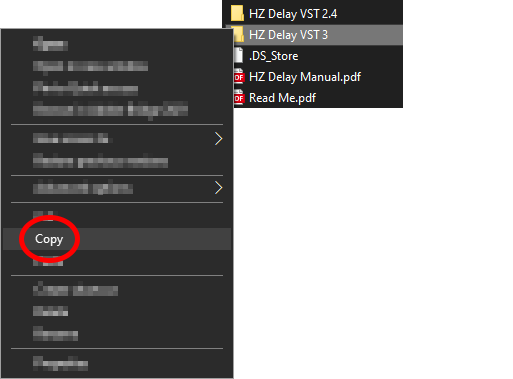
3. Right-click and copy the relevant VST 3 or VST 2.4 folder that you wish to install.
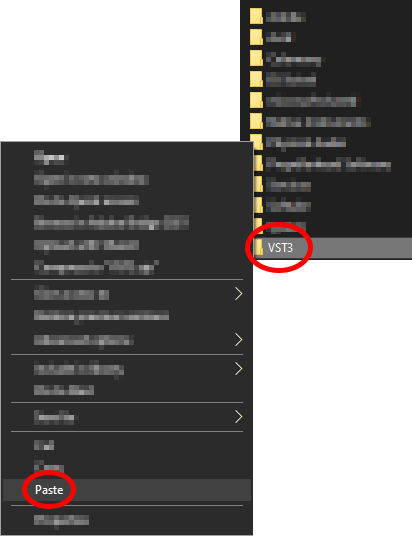
4. Paste the copied folder in the relevant location > VST3: C:\Program Files\Common Files\VST3 or VST 2.4: C:\Program Files\VSTPlugins
5. Launch your DAW > Insert HZ Delay as an insert on a new track.
Your software is now installed and ready to use.

